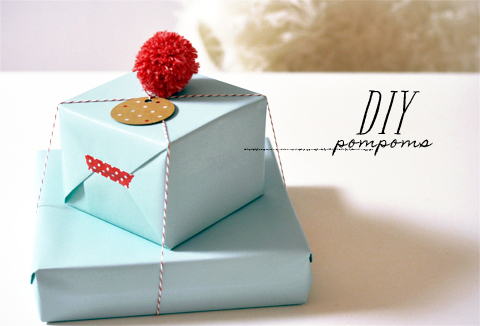
I’ve mentioned in the past that when it comes to wrapping presents I do not mess around. People have since come to expect their Christmas gift to be clad in something crafty (the pressure!) After scouring multiple paper stores around Toronto I’ve come up with a theme: winter mint with a twist (indulge me, won’t you?) The combination of red, white & mint keeps things feeling festive while straying from the a-typical.
Once I wrapped my first present I took a step back and decided that something was missing. The washi tape, twine and polka-dotted gift tags were all well and good, but it needed a bit of pizzazz. After all, I had to compete with that year I swapped wrapping paper for tin foil (some ideas are better than others by the way). So in came the pompom! Once the template was created and cut out the process went pretty quickly (and the template lasted for the 15 others I’ve since made). I’m beyond thrilled with how the entire ensemble came together and cant wait to distribute my gifts come Christmas morning.
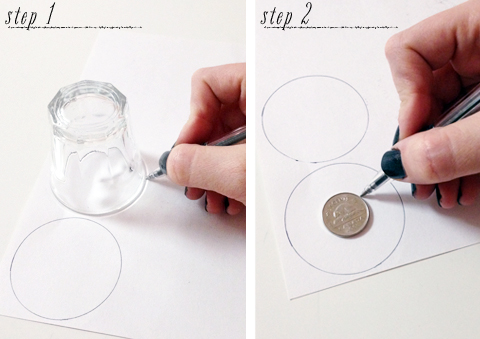
Step 1: Trace two small circles onto thick cardstock (or cardboard). As a rule – the smaller your circle, the smaller your pompom. I used a shot glass for this step (keepin’ it classy)
Step 2: Place a smaller template (in my case, a nickel) in the center of your first circle and trace around it
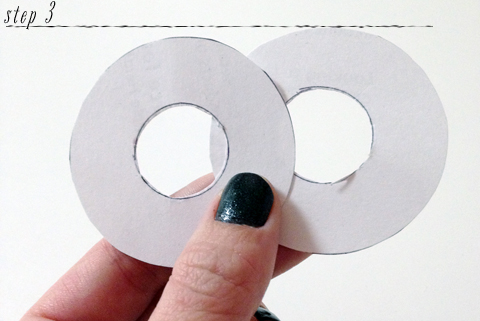
Step 3: Carefully cut your circle templates out (this does not need to be perfect)
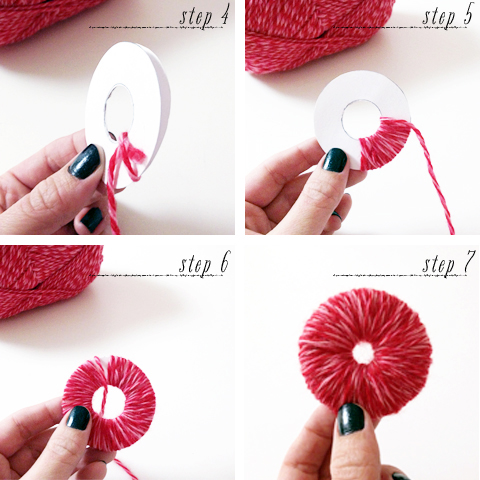
Step 4: Place both circle templates together and tie a long length of wool around them
Step 5: Wrap the wool around the templates
Step 6: Keep wrapping…
Step 7: … until it looks something like this. If your length of wool runs out, not to worry, simply tie a new length on and keep going – nobody will know. (Note: the more times you wrap the string, the denser your pompom will become. This pompom ended up being QUITE full)
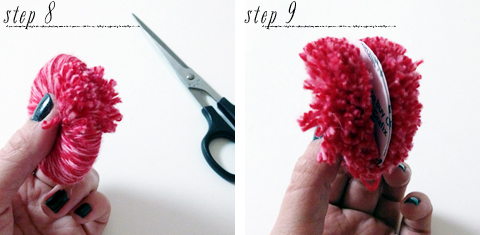
Step 8: Holding the wrapped templates between your index finger and thumb, carefully cut the wool using thin, sharp scissors…
Step 9: … until it starts to look something like this
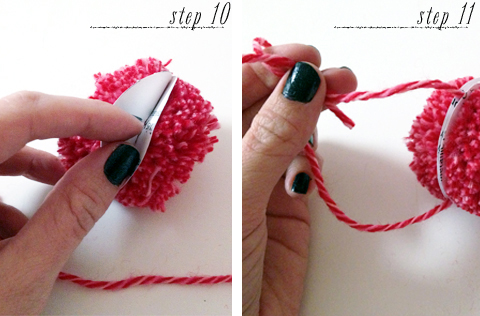
Step 10: Once you’ve cut all around the template, spread the two cardstock pieces apart
Step 11: Thread a short length of wool in between the two cardstock templates and tie it in a tight knot. Then, carefully pull the cardstock templates off at either side. (note: your pompom may need a bit of a trim if he’s looking a little uneven)

Ta da!! Now tie it on to your gift using a ribbon (or twine in my case!)
PS – there’s still a few days to enter the Illume giveaway (a $100 value!) if you havent yet
filed in /


