


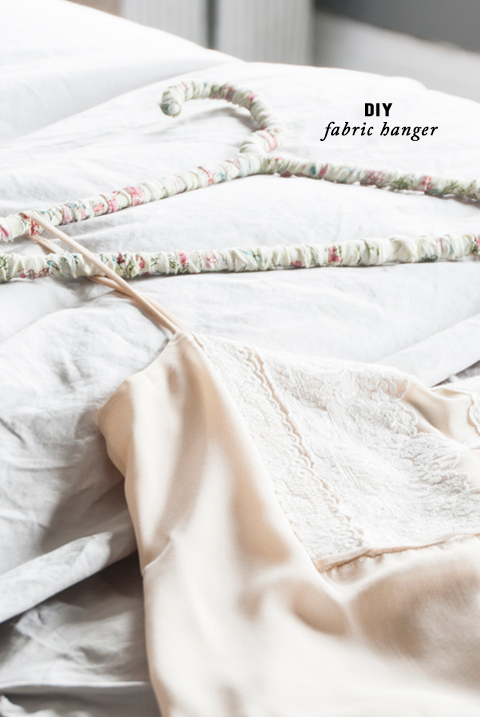
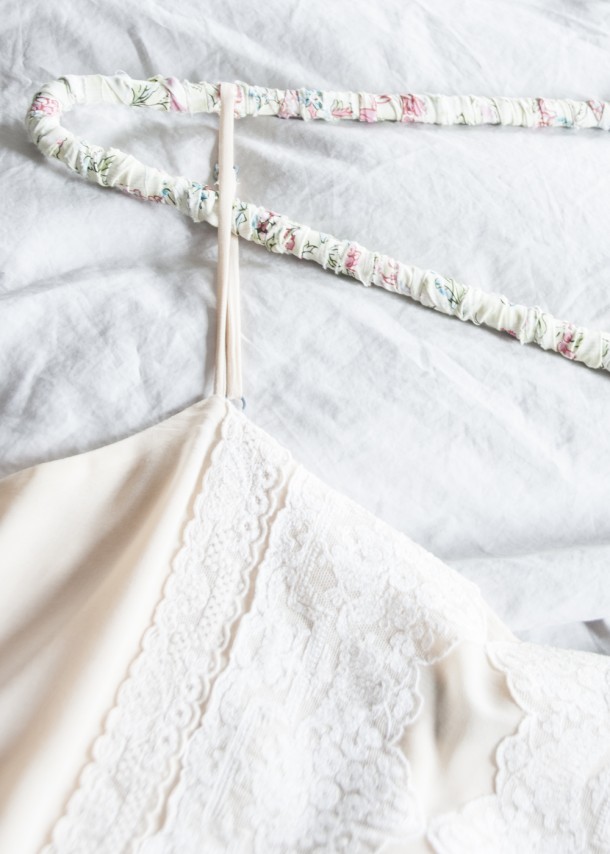
Hey guys! Erin here from House of Earnest holding down the fort while Jacquelyn is off in Mexico! I’ve whipped up a totally adorable DIY that is so easy to do I swear you could do it blindfolded. When it comes to creating beautiful things for the sake of having beautiful things, this hanger may fall into that category, but it’s so pretty when complete, that I decided to go ahead and make a bunch. When it was finished, however, I realized that it was worked wonderfully for holding onto tanks on tight and keeping dress pants in place.
Not only is it a great use for some pretty prints I have laying around (that aren’t large enough to make something substantial from), but it’s also a really unique and pretty idea for a bridal shower, housewarming or in miniature for a baby shower.
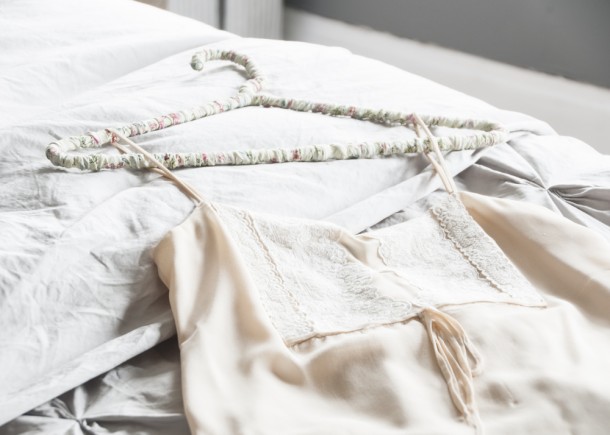
I made a few for some pretty lace tanks that I have hanging in my closet, but totally plan on making some fun colored versions for friends.

The steps are super easy, it just takes a bit of patience in the wrapping. Materials are readily available and really really customizable. Use pretty florals for a wedding shower, brightly color polka dots for some children’s hangers, or just plain colors if you’re looking for a practical solution to your slipping shirts (and pants).
![]()
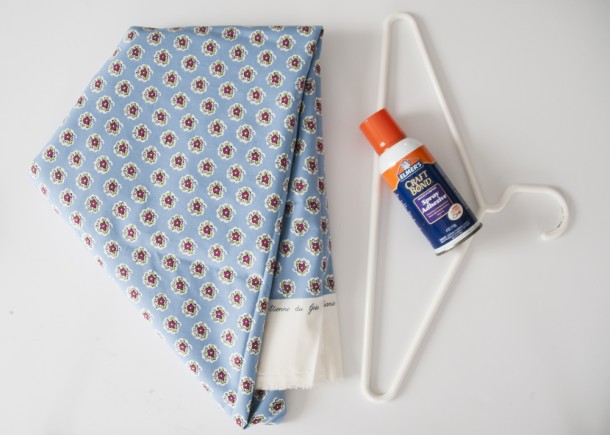
:: Plastic tubular hangers
:: Scrap cotton printed fabric
:: Spray adhesive
:: Super glue
![]()
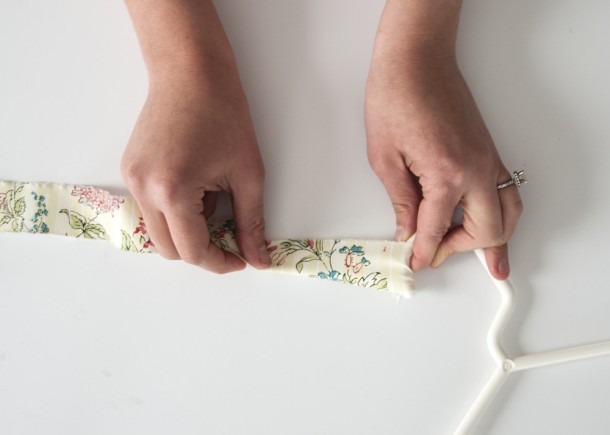
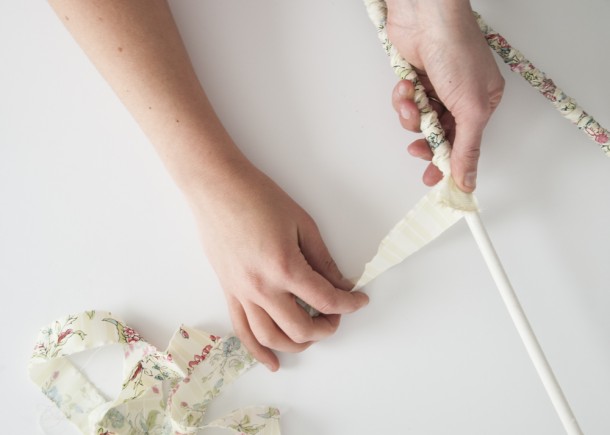
ONE Tear your fabric into 1″ wide strips. It will be a little frayed, but that is ok.

TWO: spray hook portion as well as the first few inches of the hanger with spray adhesive on one side.
THREE: start at the bent hook portion of the hanger. Wrap the fabric flatly around the tip of the hanger. Once you get it wrapped once, start twisting the fabric and re-wrap the start of the hanger with the twisted fabric, covering the flat start to the wrap.
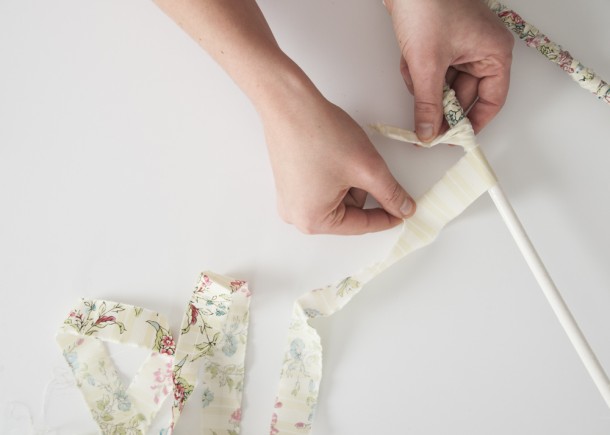
FOUR: keep twisting and wrapping around the hanger.
FIVE: just before your strip ends, start another piece – wrapped flat. Wrap the previous piece overtop of the new piece for a few rotations. Then start twisting and wrapping the new piece around the tail end of the previous piece.
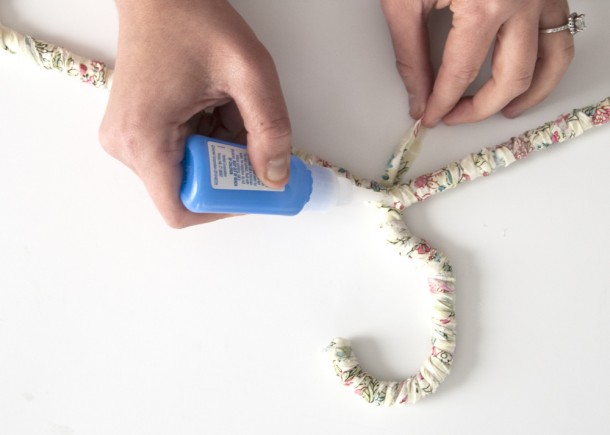
SIX: once you make it around the entire hanger, superglue the loose end into place.
It’s not difficult at all, it just take a bit of patience. Once hanger took me about 15 minutes, so set out an hour of time and make a nice set of four for someone close to you!
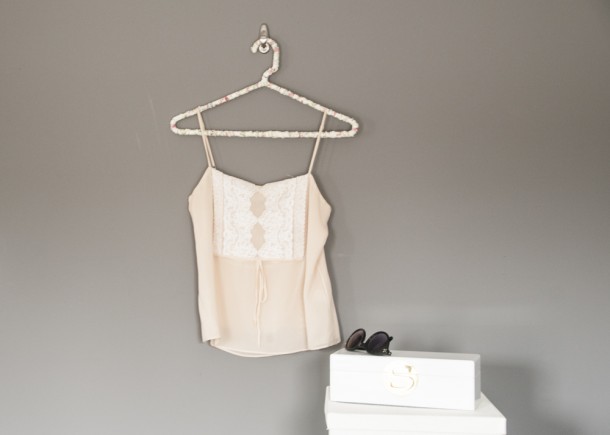
I hope you like this lovely little project as much as I do!
![]()
DIY, Copy & Photography: House of Earnest
filed in /


