


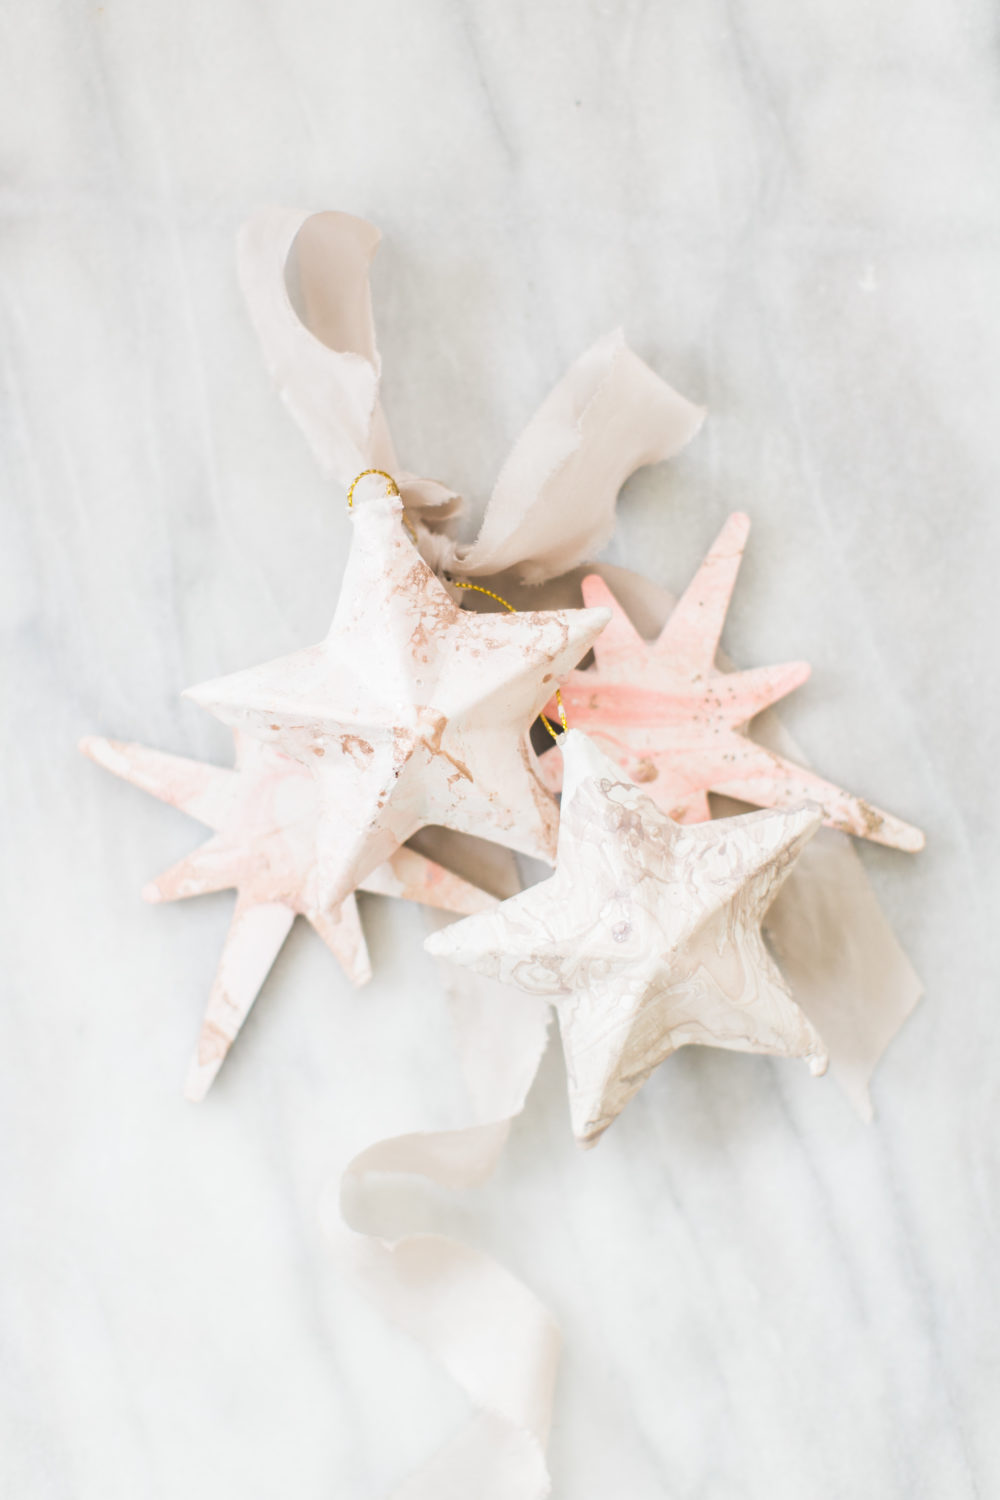
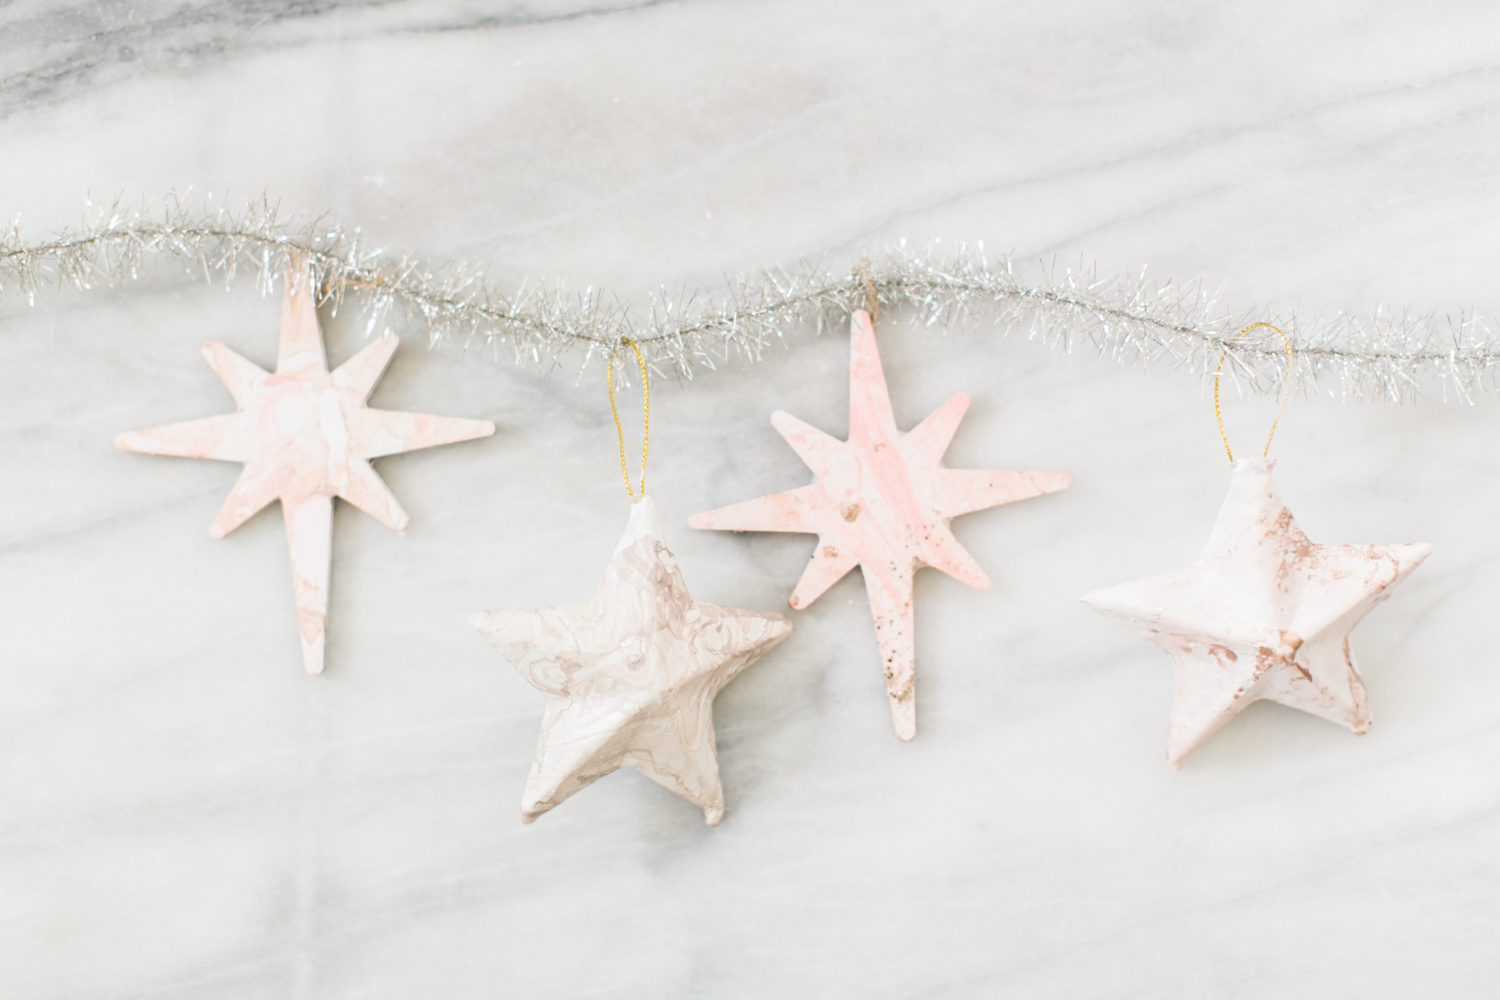
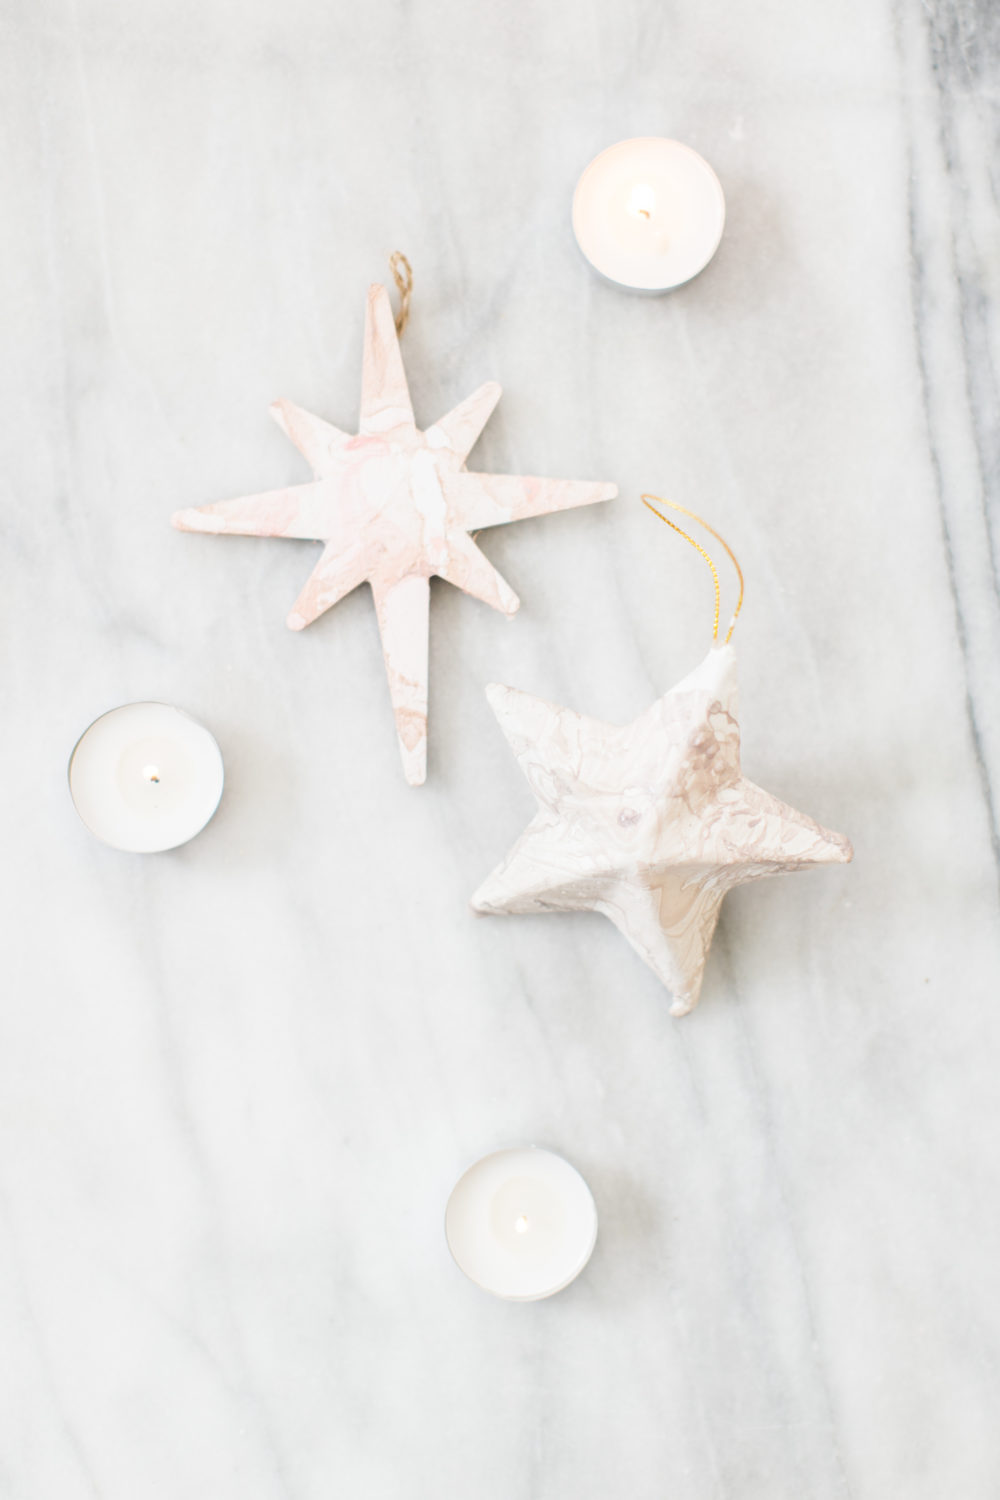
I know with certainty by now that DIY projects are just not my forte. In all honesty, I’m usually more of the “hire it out and just get it done” type – leaving it to the pros is my jam…But every now and again the urge to get crafty and flex different creative muscles strikes. And because nobody wants to end up with a #PinterestFail, I’m always on the hunt for DIYs that are quick, simple, and impactful. Enter: the DIY marbled Christmas ornament. Easy as pie, and the cutest way to dress up your tree, or holiday gifts, in a really personal way.
Note: if you do tackle this bad boy, please share on Instagram using #LarkandLinenDIY – I’d love to take a peek at your results


SUPPLIES
White acrylic paint
Foam paintbrush
Nailpolish in neutral and metallic colours
Wax paper
Wooden skewer
Wooden star ornaments
Paper mache star ornaments
Tupperware bowl (disposable)
Latex gloves
INSTRUCTIONS
1) Use the foam paintbrush to coat the ornaments with a solid coat or two of the white acrylic paint, and set aside on wax paper to dry overnight.
2) Fill the tupperware bowl with warm water, it may take some practice to get the temp just right. You need it to be just warmer than room temperature- too hot or too cold will cause the nail polish to clump up too quickly.
3) Lightly swirl some nail polish on top of the water. Use the wooden skewer to marble the polish, then quickly dip in a star ornament. Pull out the ornament and lay on wax paper to dry.
4) Repeat steps 2-3 for the remaining ornaments. You can also dip each ornament more than once if you’d like to do multiple colors. I recommend starting with the lightest nail polish color then layering on darker or metallic colors.
Photography: Ruth Eileen Photography
filed in /


